Product Knowledge
1, Selection of the Copper nozzles
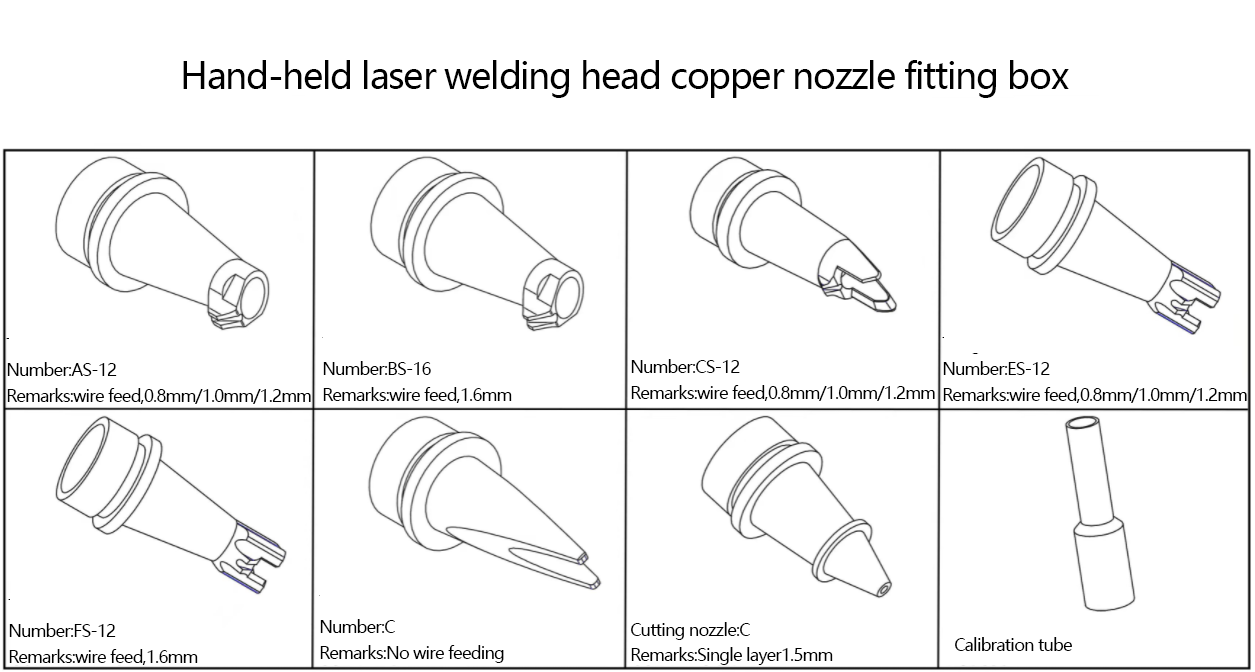
If you need to do laser cutting, there is only one style of cutting nozzle available.
If you need to do laser welding, you can select the suitable styles as the below videos explained.
2, Selection of the Welding wire
● The different material welding plates should use different welding wires (gas shielded solid wire).
Stainless steel plate should use stainless steel welding wire such as ER304
Carbon steel/galvanized plate should use iron welding wire
Aluminum plate should use aluminum wire (aluminum welding wire, we suggest to use higher than 5 series of alloy aluminum, which has higher hardness and is not easy to jam).
● You can choose the sizes of the welding wires according to this Process/Technology chart, only for reference. .
3, Selection of Gas
● Usually both Nitrogen and Argon can be used for all materials. Like: Stainless steel, mild steel, carbon steel, iron, aluminium, brass, etc. You can choose to use Nitrogen or Argon as shielding gas according to your market price. For welding stainless steel, we suggest using nitrogen, which has better welding effect. Do not use mixed/carbon dioxide gas.
● Air pressure requirements: the flow meter shall not be less than 15, the pressure gauge shall not be less than 3MPA.
4, Adjust the Focus point
Normally the "0" on the focus calibration will be selected. But you should adjust the focus calibration to be "0 focus" based on the actual conditions.
Please check the below video learning how to adjust the Focus.
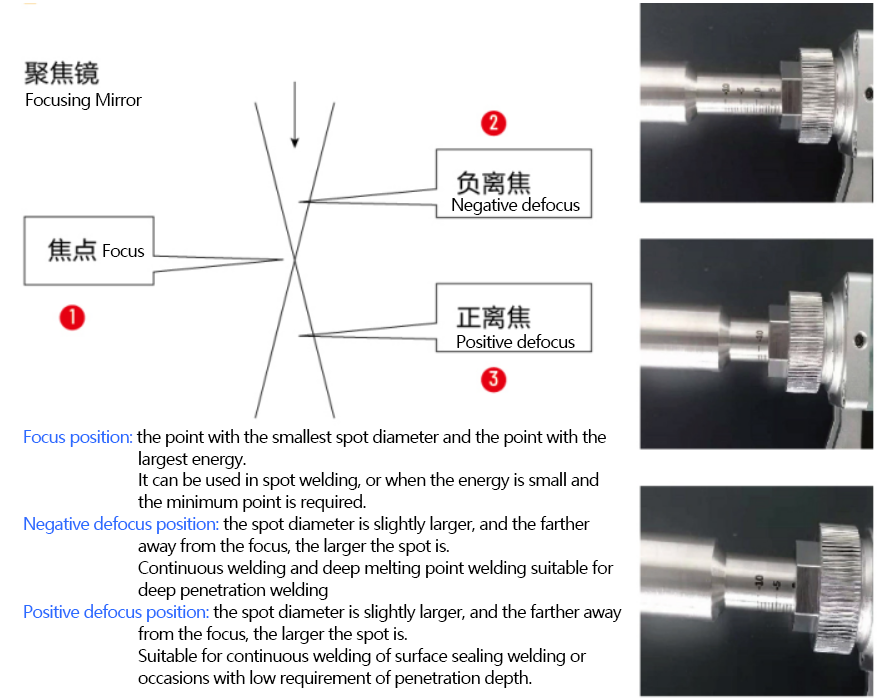
● General process control of continuous penetration welding: if the trace of slight discoloration can be seen on the back at a single point, better penetration welding can be achieved during continuous welding; If you see obvious marks on the back, you can even feel that it has penetrated, then it will splash and even appear a deep pit during continuous welding. Specifically, the focal length, energy and waveform should be adjusted according to the actual sample.
● The thinner the material, the smaller the required light spot, otherwise there will be welding penetration.
4, Adjust the red light deviation to be center
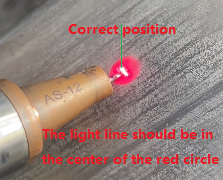
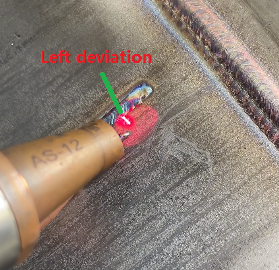
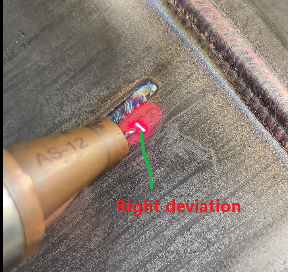
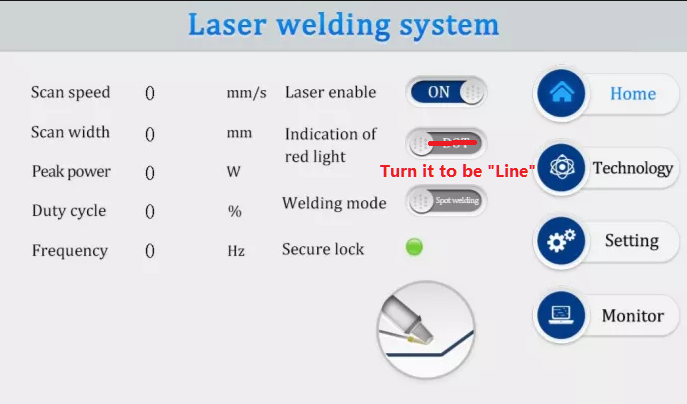
Methods one: Software adjustment
The first one is adjust via Software Settings (can only do Left / Right Adjustment)
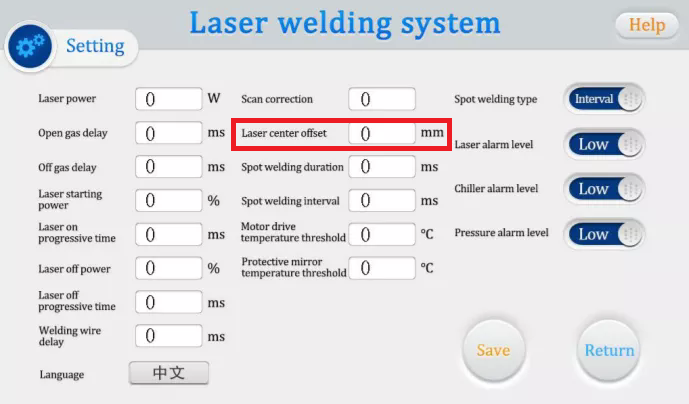
You can set the value in the setting page(negative value to the right and positive value to the left, and the maximum adjustable value is +3/-3}. If it still cannot be adjusted by this method, mechanical adjustment should be applied.
Methods Two: Mechanical adjustment ( Left / Right , Up / Down, the Up/Down adjustment can only be achieved by Mechnical adjustment )
Before mechanical adjustment, be sure to set the "Laser center offset " to be 0.
For your reference, you can check the below of our demo of the SUP21T plastic handle torch head. The methods of adjustment for different model torch heads maybe different.
